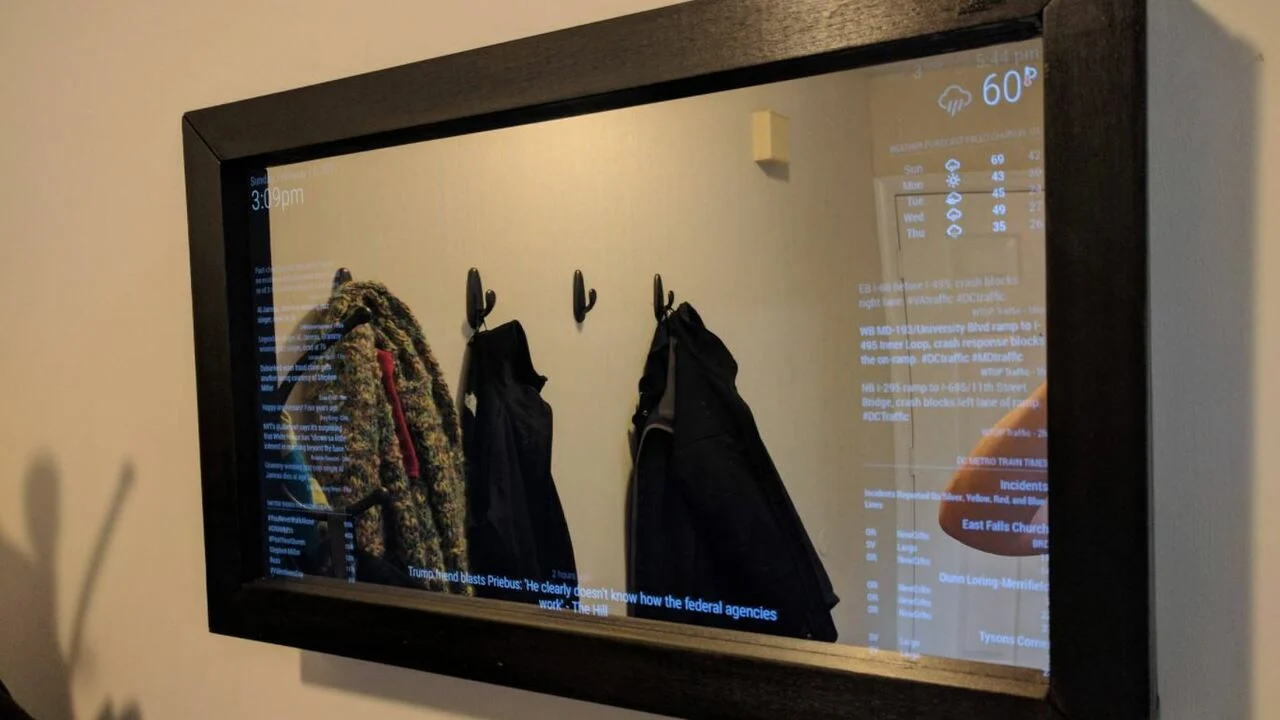
A smart mirror is a futuristic and functional addition to any home. It combines a mirror’s reflective surface with a display that provides useful information and interactive features. Building your own DIY smart mirror allows you to customize its features, design, and functionality. In this guide, we will walk you through the steps to create your own interactive mirror display.

1. Gather the Necessary Components:
a. Two-way Mirror: Select a high-quality two-way mirror that allows light to pass through while maintaining reflective properties.
b. Monitor or Display Panel: Choose a suitable display panel or repurpose an old monitor with HDMI input.
c. Raspberry Pi: Use a Raspberry Pi computer to power and control the smart mirror. The Raspberry Pi 4 or Raspberry Pi 3 are popular choices.
d. Frame or Enclosure: Decide on a frame or enclosure that fits your design preferences and mirror dimensions.
e. Power Supply: Ensure you have a suitable power supply for the Raspberry Pi and display.
2. Prepare the Display:
a. Disassemble the monitor if using a repurposed one, removing unnecessary parts like the casing and stand.
b. Position the display panel or monitor behind the two-way mirror to ensure it fits properly within the frame or enclosure.
3. Set Up the Raspberry Pi:
a. Install the operating system onto the Raspberry Pi, such as Raspbian or a dedicated smart mirror software like MagicMirror².
b. Connect the Raspberry Pi to the display using an HDMI cable.
c. Power on the Raspberry Pi and configure the necessary settings.
4. Design and Customize the Smart Mirror Interface:
a. Install and configure the smart mirror software, following the specific instructions provided by the chosen software.
b. Customize the interface by selecting and arranging modules or widgets that display the information you desire, such as time, weather, calendar, news, or even live feeds from security cameras or social media.
c. Experiment with different modules, layouts, and design elements to create a visually appealing and functional display.
5. Mount the Mirror and Enclosure:
a. Secure the two-way mirror onto the frame or enclosure, ensuring it fits snugly and without any gaps.
b. Position the Raspberry Pi and display assembly behind the mirror, taking care to align them properly and secure them in place.
6. Finishing Touches:
a. Connect the power supply to the Raspberry Pi and the display.
b. Test the smart mirror to ensure it powers on and displays the desired information correctly.
c. Adjust the brightness and settings of the display to optimize visibility.
7. Installation and Placement:
a. Choose the ideal location for your smart mirror, considering factors like lighting, accessibility, and functionality.
b. Mount the smart mirror securely on the wall or use a stand to position it on a countertop or table.

Conclusion:
Building your own DIY smart mirror allows you to create a personalized and interactive mirror display. By following the steps in this guide, you can gather the necessary components, set up the Raspberry Pi, customize the interface, and assemble the mirror. Enjoy the convenience of viewing useful information, checking the weather, or even controlling other smart devices, all while using your smart mirror as a functional mirror in your home. Embrace the technological elegance of your DIY smart mirror and impress your guests with this innovative and stylish addition to your living space.